Overview
This article serves as a comprehensive guide detailing the three essential steps for installing a cabinet ventilation fan. These steps encompass:
- Gathering the necessary tools and materials
- Adhering to step-by-step installation instructions
- Effectively troubleshooting common issues
Each stage is underpinned by specific recommendations and safety precautions that are crucial for ensuring a successful installation and optimal performance of the ventilation system. Notably, the article emphasizes the significance of proper fan placement and ongoing maintenance to prevent the overheating of electronic components, thereby safeguarding their functionality.
Introduction
In an age where electronic devices are indispensable to daily life, ensuring their optimal performance through proper ventilation is paramount. Installing a cabinet ventilation fan not only protects valuable equipment from overheating but also enhances their longevity and efficiency. Yet, the installation process can often appear intimidating, prompting many to question: what are the essential steps for a successful setup? This guide will demystify the straightforward process of installing a cabinet ventilation fan, offering vital insights and practical solutions to common challenges encountered along the way.
Gather Necessary Tools and Materials
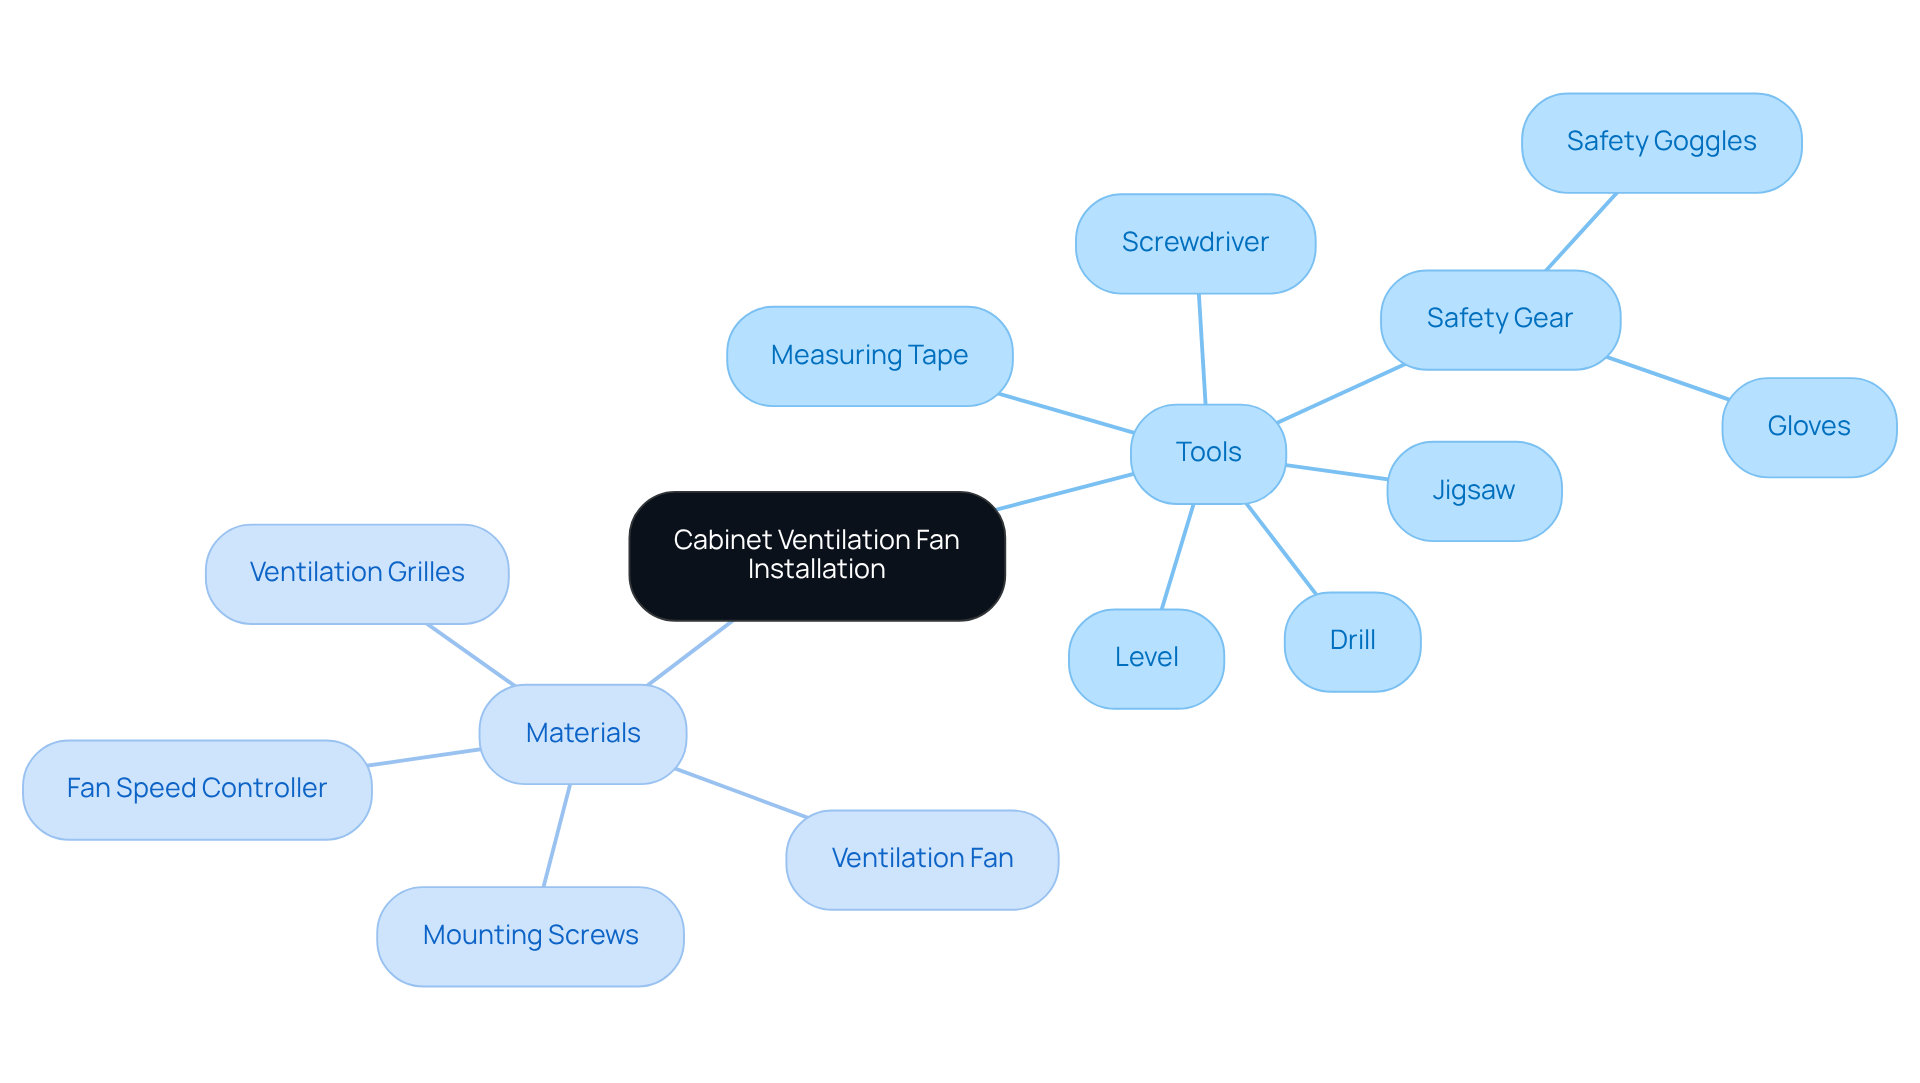
To successfully install a cabinet ventilation fan, it is crucial to gather and materials for a smooth process. Here’s what you’ll need:
Tools:
- Screwdriver (both Phillips and flathead) for securing components.
- Drill with drill bits to create required openings.
- Measuring tape to guarantee precise dimensions.
- Jigsaw or hole saw (3-1/4″ recommended) for cutting fan holes efficiently.
- Level to guarantee proper alignment of the fan.
- Safety goggles and gloves for personal protection during installation.
Materials:
- Cabinet ventilation fan (ensure it matches your cabinet size for optimal performance). Gagner-Toomey Associates offers a range of optimized for efficiency and low noise, ensuring [effective cooling](https://gagner-toomey.com/10-benefits-of-blower-dc-fans-for-electronics-cooling) with airflow exceeding 40 CFM.
- Mounting screws (typically included with the fan) for secure installation.
- Optional: Fan speed controller for adjustable airflow, enhancing cooling efficiency.
- Optional: Ventilation grilles for a polished aesthetic finish.
By collecting these items in advance, you can simplify the installation process, ensuring that your cabinet ventilation fan functions efficiently to avoid overheating and sustain ideal conditions for your electronics.

Follow Step-by-Step Installation Instructions
- Determine cabinet ventilation fan placement by identifying optimal locations, positioning one cabinet ventilation fan near the top for exhaust and another near the bottom for intake. This configuration significantly enhances airflow efficiency by promoting natural convection, allowing warm air to escape while drawing in cooler air from below. Each server enclosure should be equipped with at least two fans, each moving a minimum of 10 cubic feet per minute (CFM) of air.
- Mark the Holes: Utilize a measuring tape to accurately mark the positions for the fan holes on the cabinet. It is essential to ensure that the markings are level and appropriately spaced to accommodate , which is crucial for maintaining effective airflow.
- Cut the Holes: Carefully cut out the marked holes using a jigsaw or hole saw. Always wear safety goggles to protect your eyes from debris during this process.
- Install the Fan: Position the fan over the holes and secure it with mounting screws. Ensure that it is tightly fastened to minimize vibrations, which can adversely affect performance and longevity.
- Connect the Power Supply: Follow the manufacturer’s instructions to connect the fan to the power supply. Ensure that all connections are secure and insulated to prevent short circuits, which can lead to equipment failure.
- Test the Fan: After installation, turn on the fan to verify its operation. Listen for any unusual sounds or vibrations that may suggest improper installation, and make adjustments as needed to achieve optimal performance.
Note: To calculate the recommended CFM for a cabinet, divide the cabinet dimensions by 1728 and multiply by three. This calculation assists in providing sufficient ventilation for electronic components, enhancing their performance and lifespan. Incorporating insights from HVAC professionals, such as Dustin Meredith, can provide additional guidance on effective fan installation techniques.

Troubleshoot Common Installation Issues
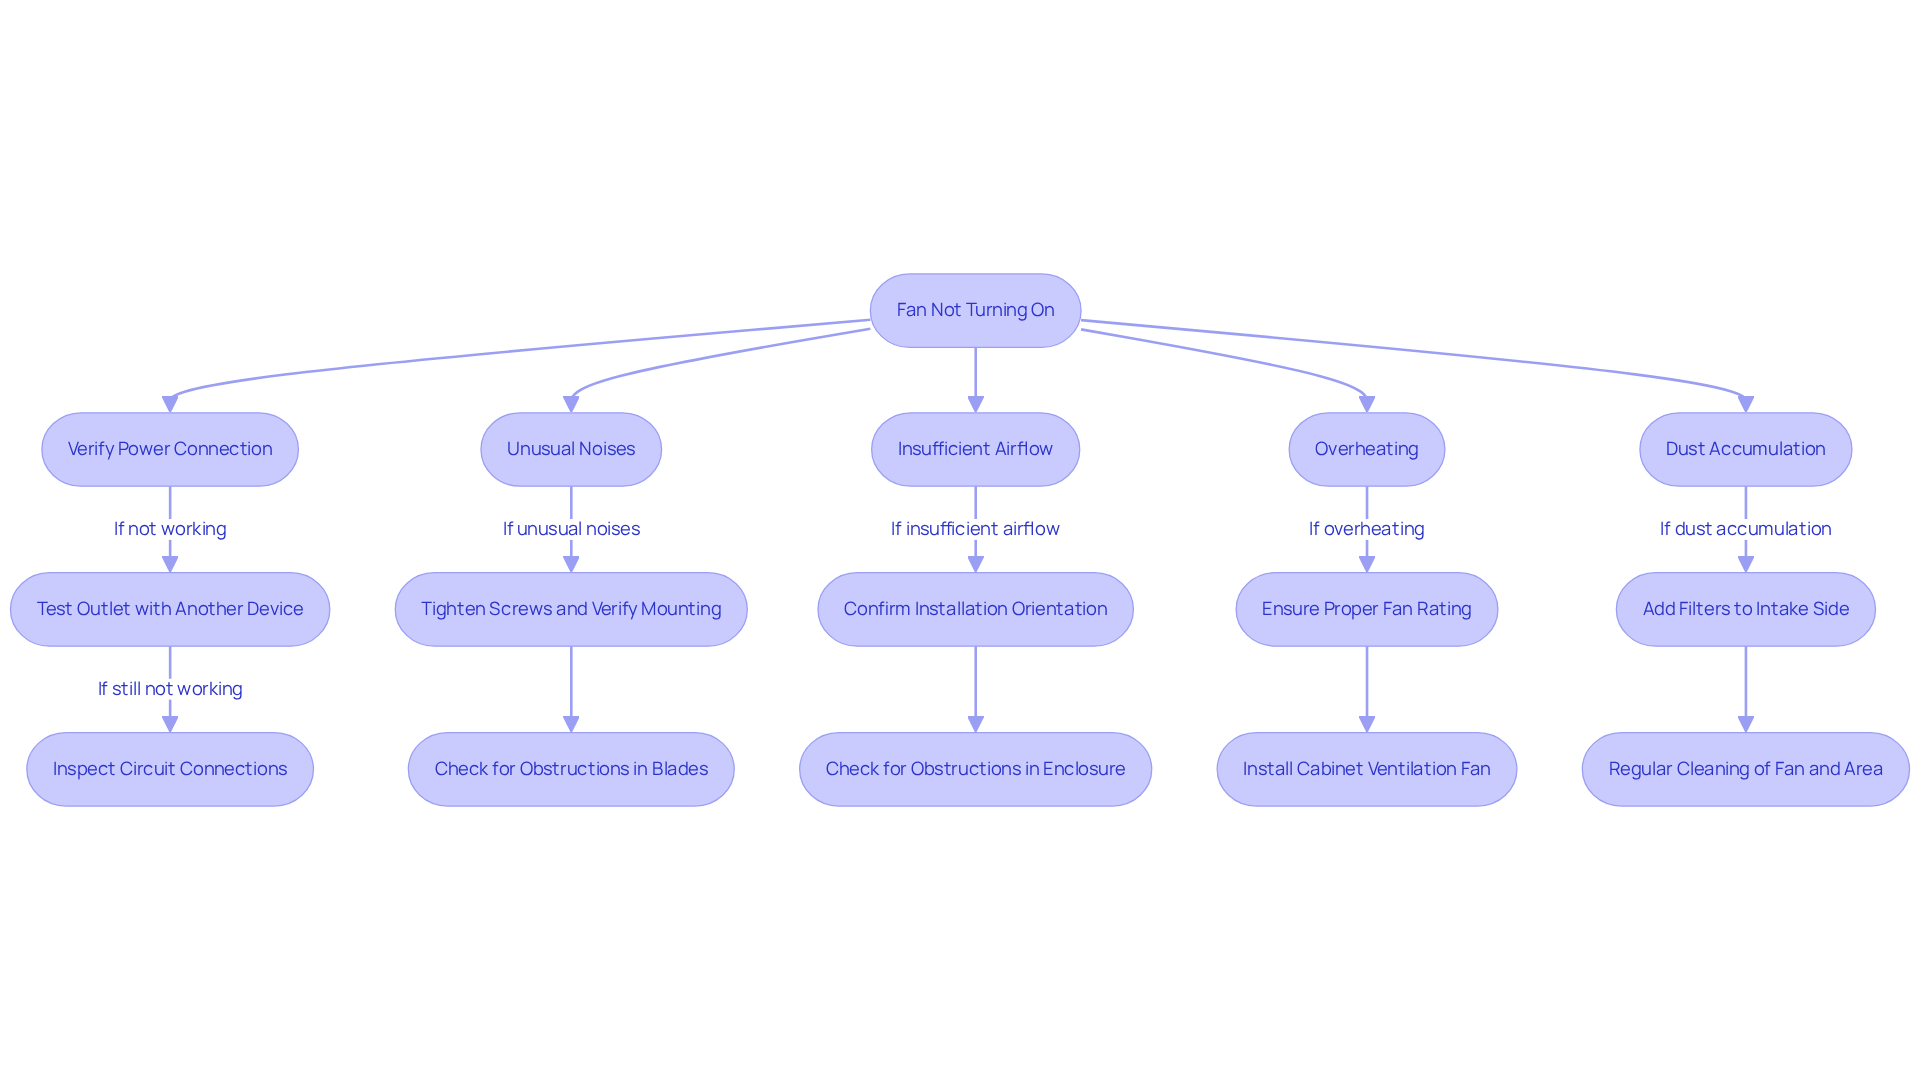
- Fan Not Turning On: Begin by verifying the power connection to ensure it is secure. Test the outlet with another device to confirm its functionality. If the fan remains unresponsive, inspect the circuit connections for any faults.
- Unusual Noises: Strange noises from the fan often indicate loose screws or improper mounting. Tighten all screws and verify that the fan is securely attached. Additionally, check for any obstructions in that could cause vibrations.
- Insufficient Airflow: Weak airflow may result from incorrect installation orientation (intake vs. exhaust). Confirm that the cabinet ventilation fan is positioned correctly and check the enclosure for any obstructions that could hinder airflow. Regular maintenance, including cleaning filters, can also enhance performance.
- Overheating: If the fan is overheating, ensure it is appropriately rated for the cabinet size and not running continuously at maximum speed. Installing a cabinet ventilation fan can help manage its operation and prevent overheating.
- Dust Accumulation: To reduce dust buildup, consider adding filters to the intake side of the fan. Regular cleaning of the fan and surrounding area is essential for maintaining optimal performance and extending the fan’s lifespan.

Conclusion
Installing a cabinet ventilation fan is crucial for ensuring the efficient operation and longevity of electronic devices housed within cabinets. By adhering to the outlined steps and utilizing the appropriate tools and materials, anyone can successfully implement this essential upgrade. This not only enhances airflow but also prevents overheating, safeguarding your valuable equipment.
This guide has detailed the necessary preparations, including the collection of tools such as:
- Screwdrivers
- Drills
- Safety gear
Alongside materials like:
- The suitable fan
- Mounting screws
The step-by-step installation process underscores the significance of proper fan placement, precise measurements, and secure connections. Moreover, addressing common troubleshooting issues ensures that any potential problems can be swiftly resolved, maintaining optimal functionality.
In an increasingly technology-driven world, ensuring proper ventilation transcends mere preventive measures; it embodies a proactive strategy for maintaining equipment performance. By applying the insights shared in this guide, individuals can take control of their electronic environments, ensuring optimal functionality and extending the lifespan of their devices. Embrace the advantages of a well-ventilated cabinet and take decisive action today—your electronics will undoubtedly benefit.
Frequently Asked Questions
What tools are necessary for installing a cabinet ventilation fan?
The necessary tools include a screwdriver (both Phillips and flathead), a drill with drill bits, a measuring tape, a jigsaw or hole saw (3-1/4″ recommended), a level, and safety goggles and gloves for personal protection.
What materials do I need to gather for the installation?
You will need a cabinet ventilation fan that matches your cabinet size, mounting screws (typically included with the fan), and optionally, a fan speed controller for adjustable airflow and ventilation grilles for a polished aesthetic finish.
Why is it important to gather tools and materials before starting the installation?
Gathering tools and materials in advance simplifies the installation process, ensuring that the cabinet ventilation fan functions efficiently to avoid overheating and maintain ideal conditions for your electronics.
What is a recommended feature of cabinet ventilation fans from Gagner-Toomey Associates?
Gagner-Toomey Associates offers high-performance DC fans optimized for efficiency and low noise, with airflow exceeding 40 CFM, ensuring effective cooling.

